Freezing Peaches

IMAG1646Peaches are God’s gift to the Earth, and it is finally August! They are my absolute favorite fruit, and I refuse to eat any others than in season, Utah peaches. The one exception to that is frozen, Utah peaches (say, in the middle of January). I buy my peaches by the box, and never at the store. I prefer to go straight to the farmer. My favorite farm to buy them from is in Orem on 400 S and about 250 W. I discovered them last year, while on a ReStore run, and have been stalking them since the end of July of this year. The farmer is very kind and added extra peaches to my box, which was only $18!

To freeze peaches, you need a few supplies: a big pot of water, filled half way, snack size bags, quart size freezer bags, a sharpie, a colander or large plastic bowl, a draining spoon, and a knife. You will, also, need free stone peaches. Free stone means that the peach will come right off the pit without much effort on your part. This is essential for preserving, so that you can save your sanity.

IMAG1651

First, clean your sink. Do your dishes, and scrub all the gunk off the walls of your sink. You need this area to be clean, because your peaches will be down in there.

Second, boil that big pot of water.

IMAG1655

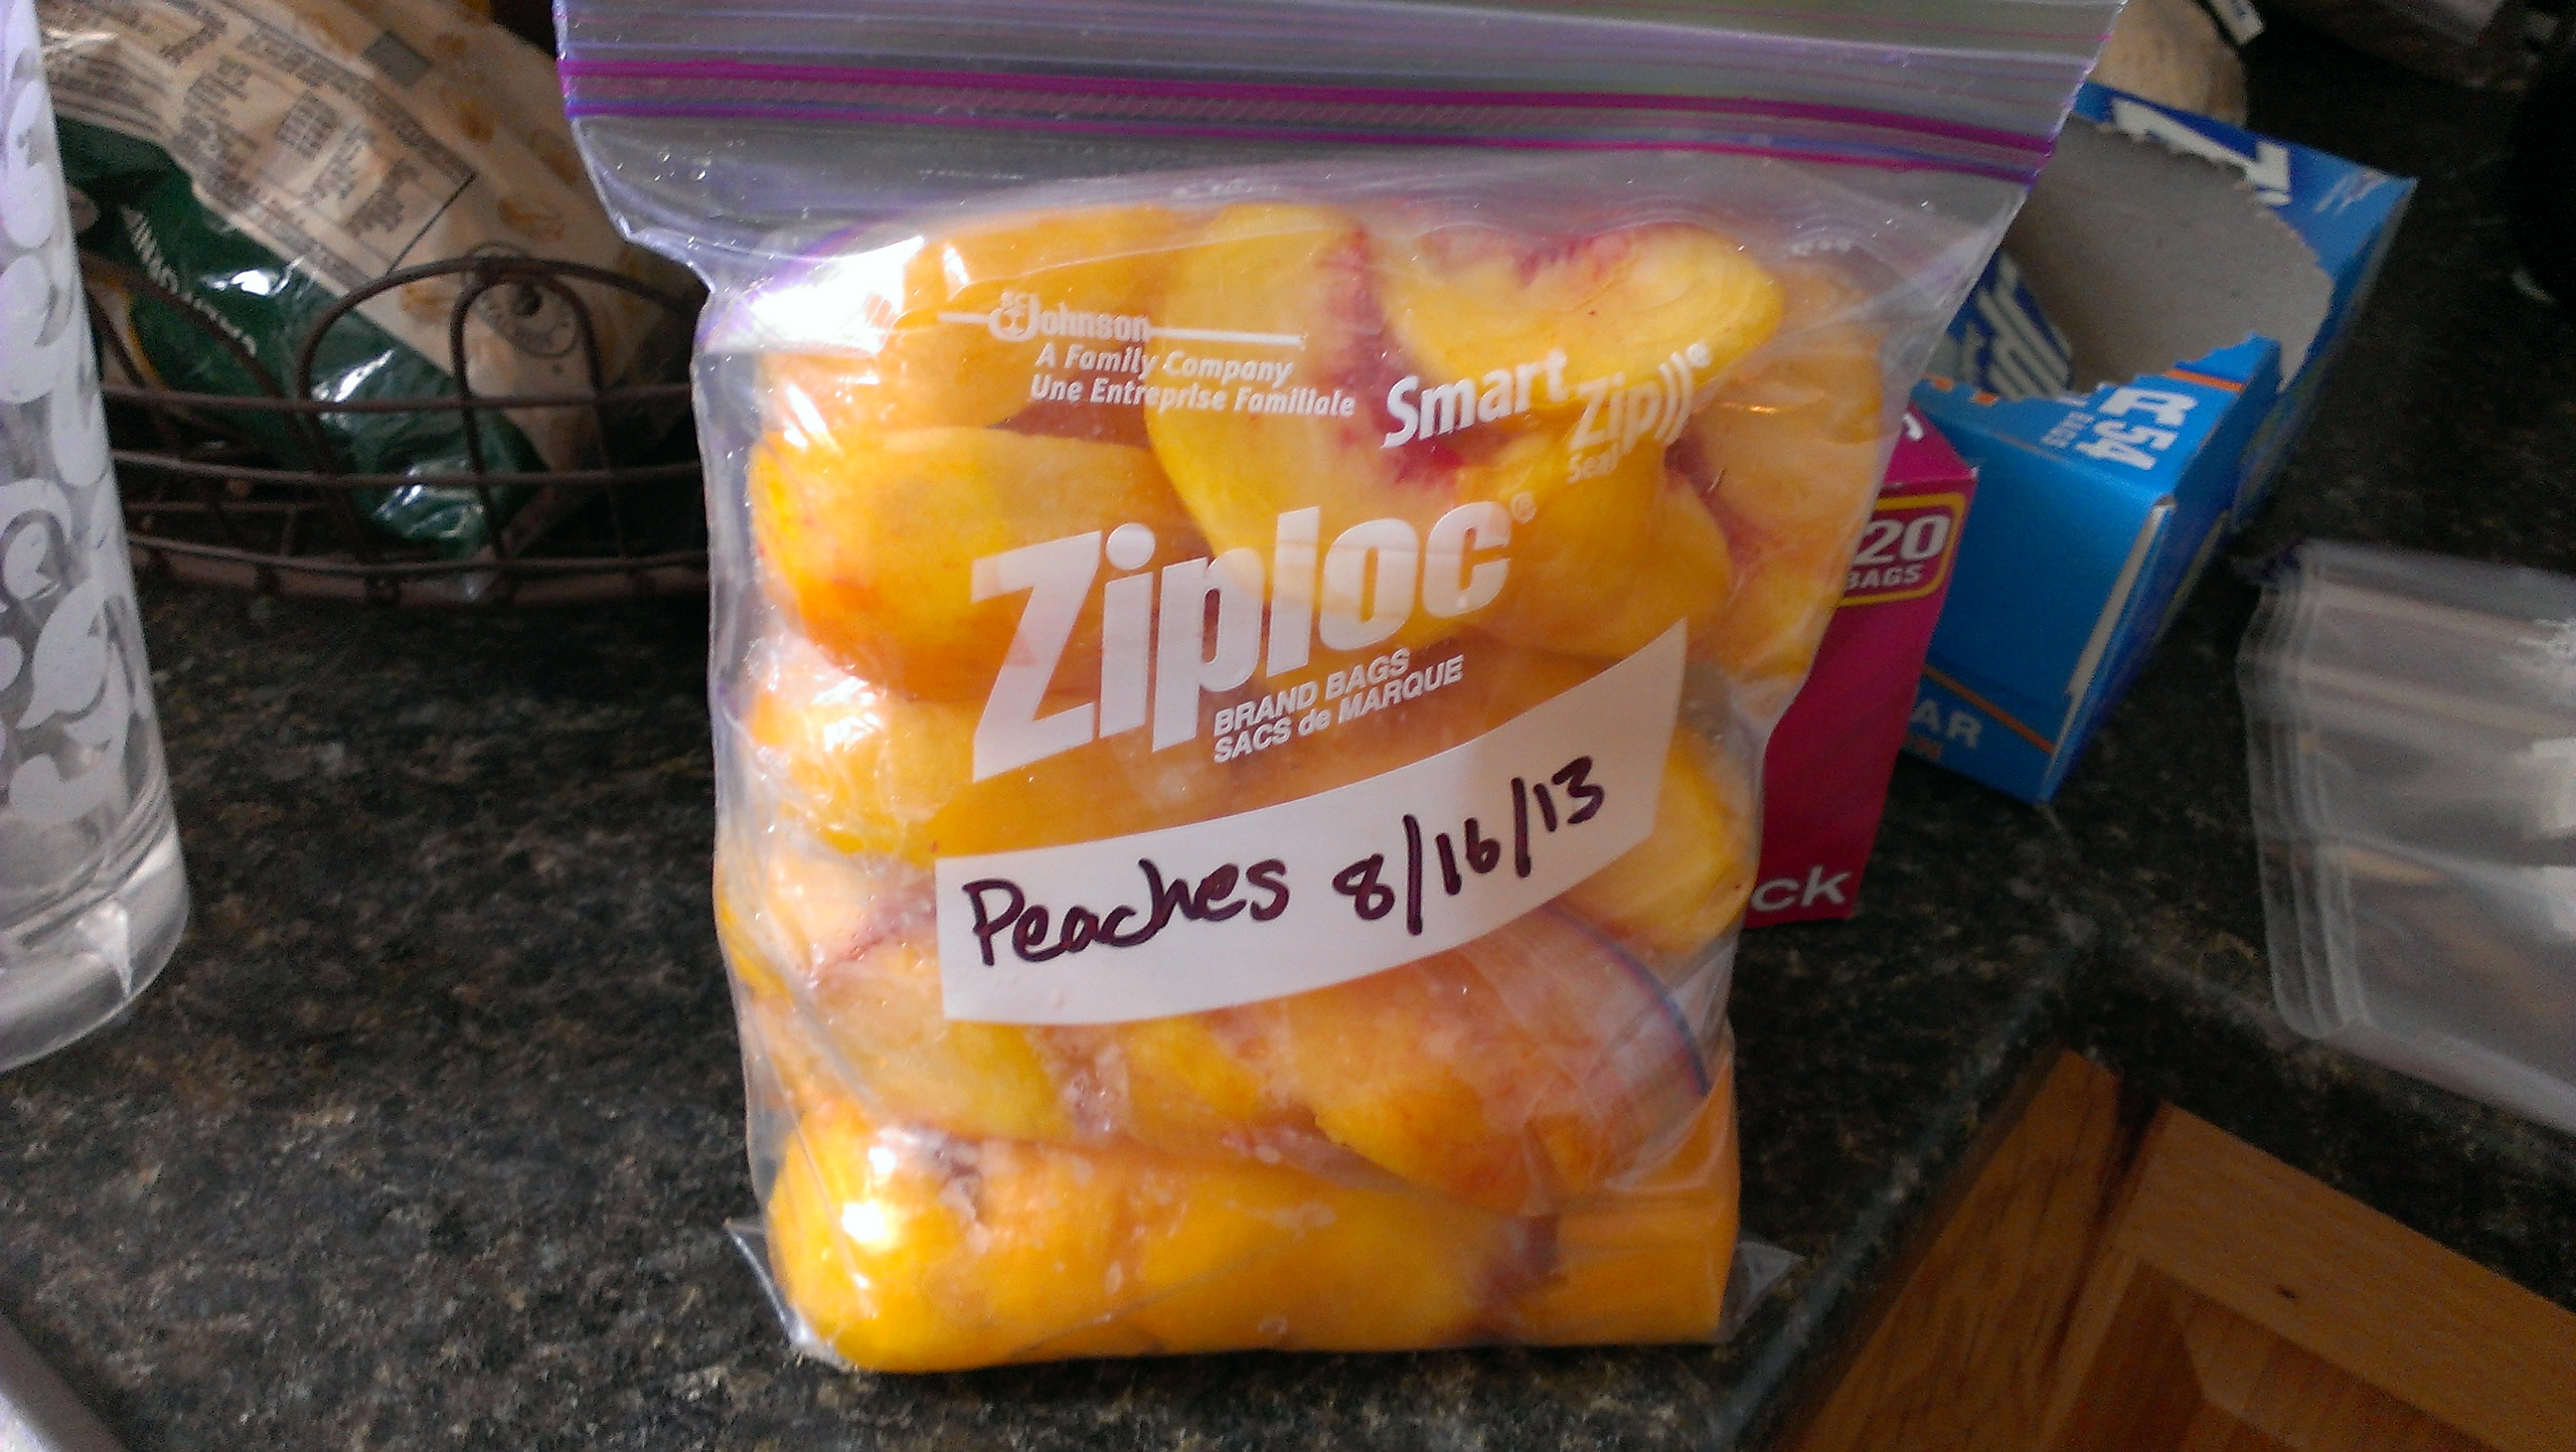
Third, while the water is coming to a boil, use your sharpie to label the quart size bags, “Peaches” and the date.

IMAG1661

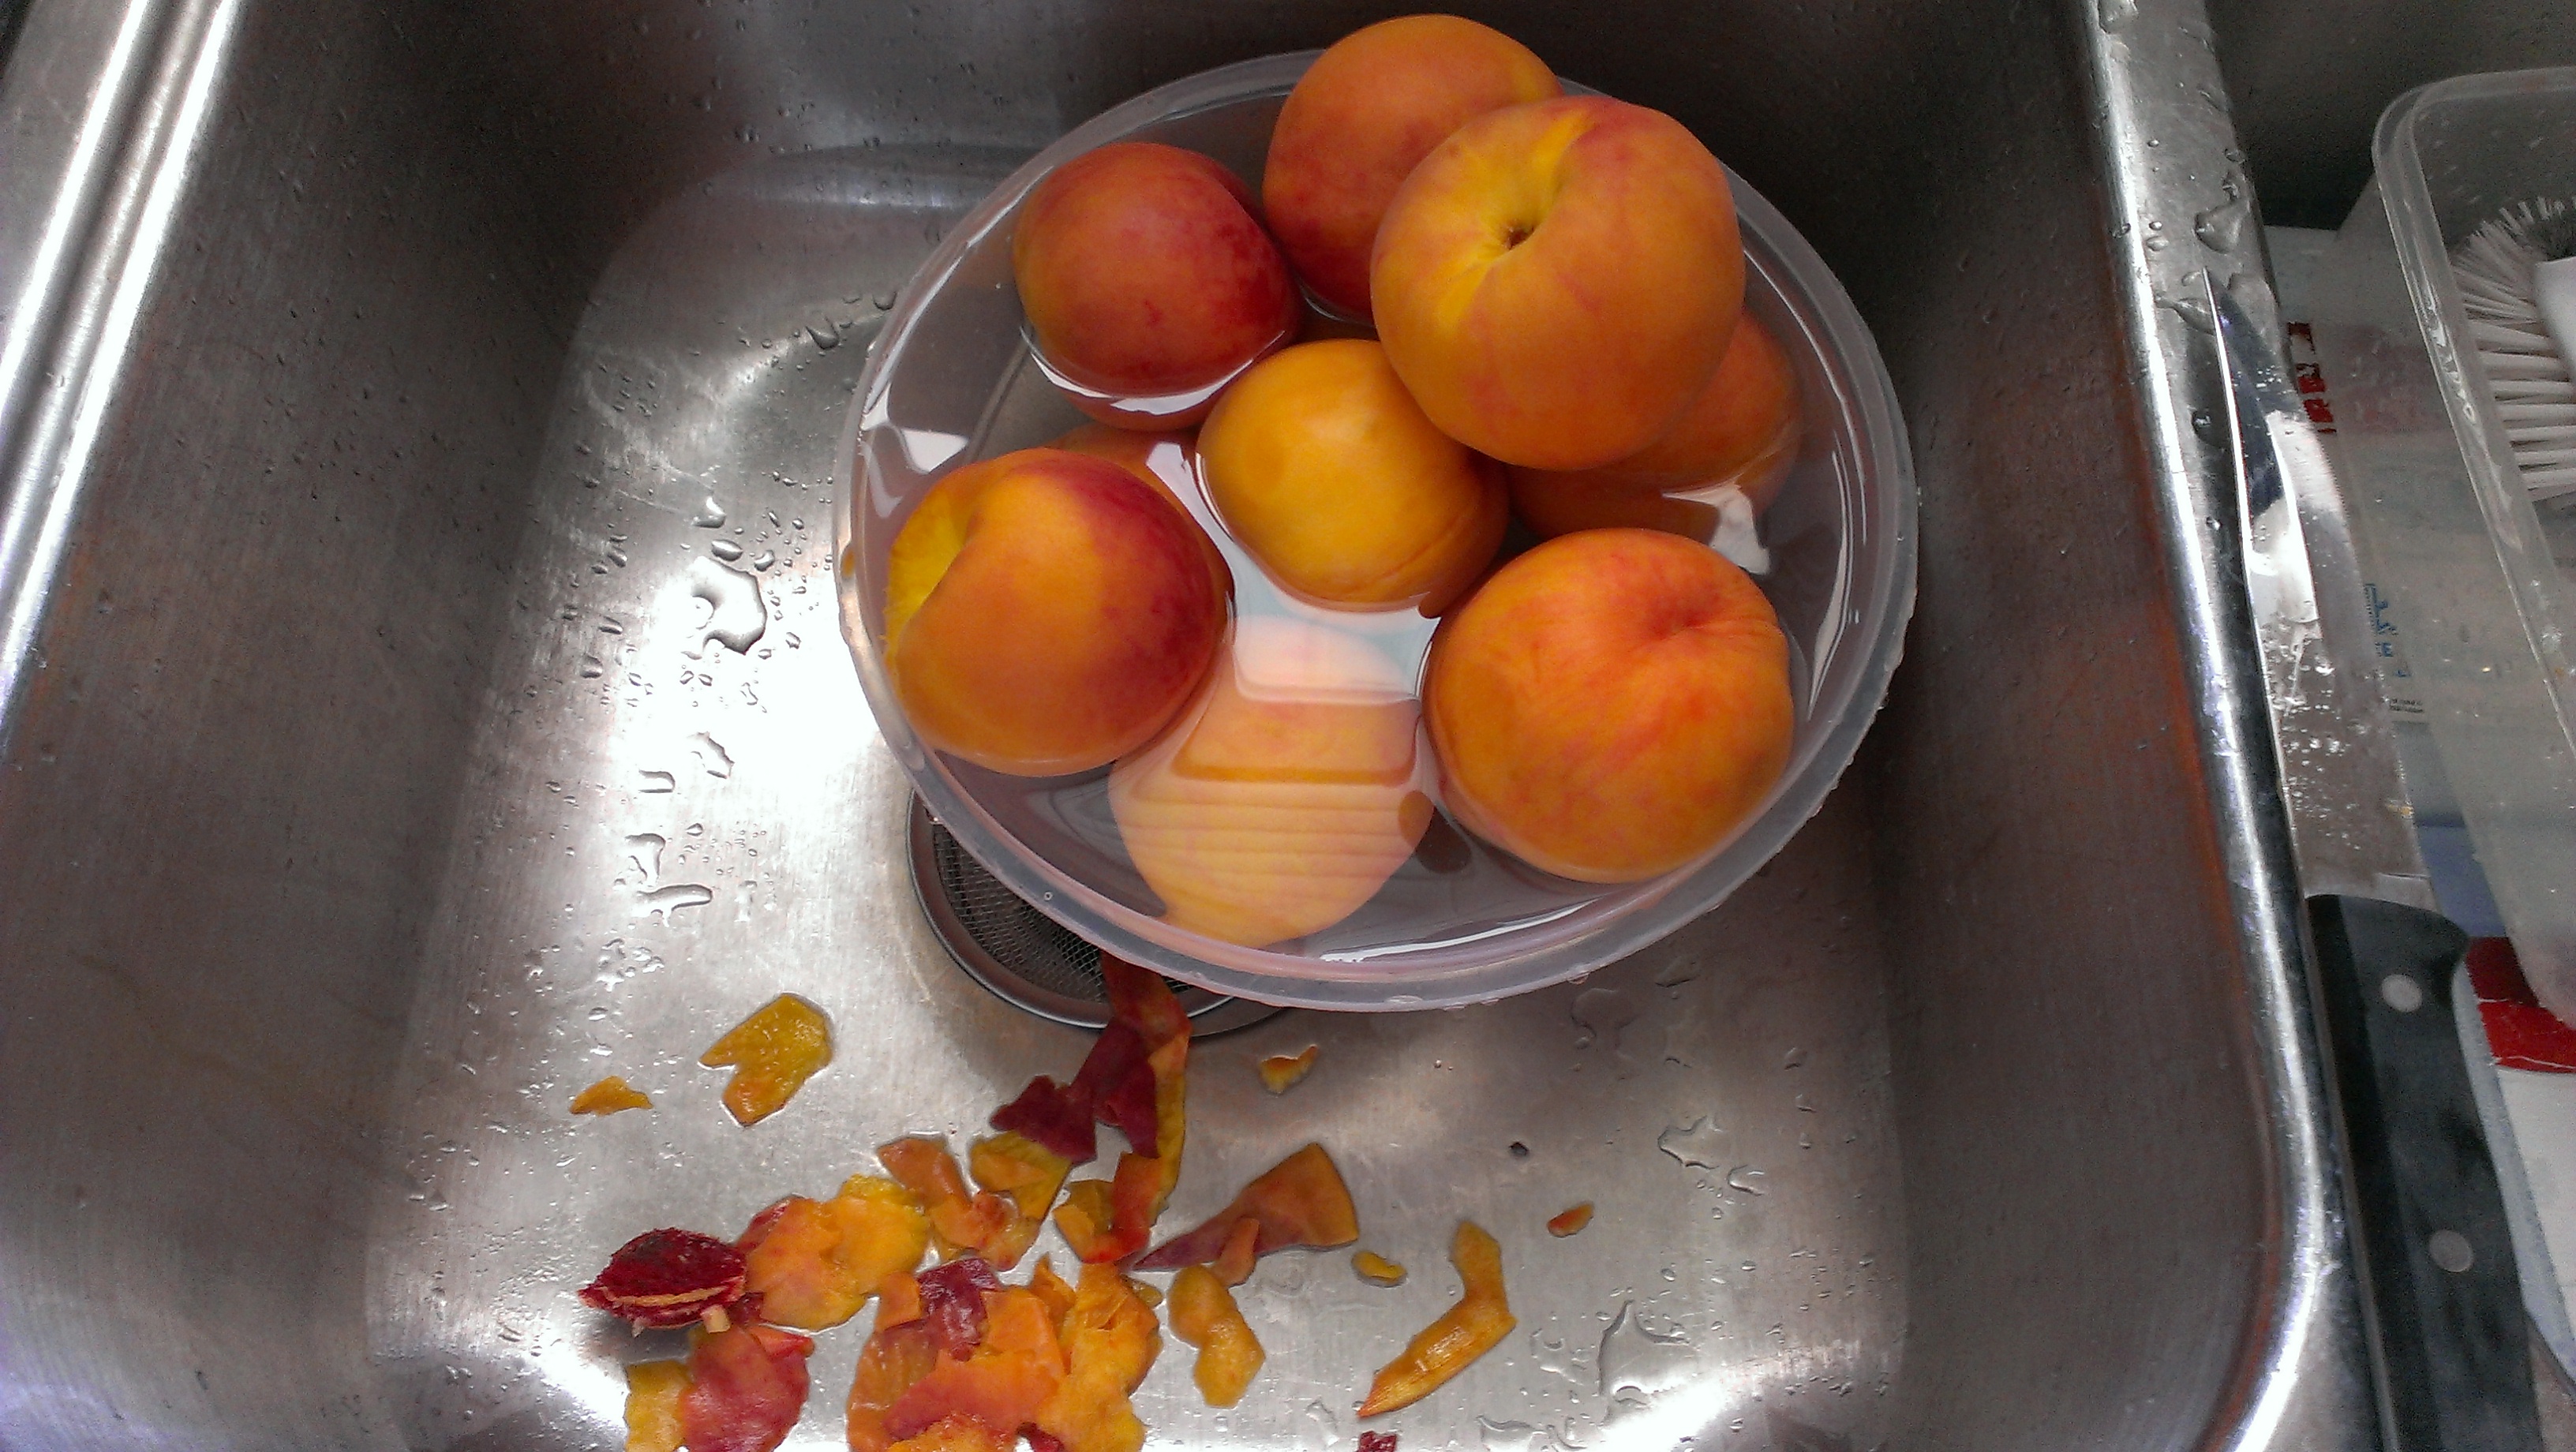
Fourth, once the water has come to a boil. Add as many peaches as you can. Boil for 30 seconds. Set your timer, so you get it right. Then pull the peaches out using the spoon, and put them in the colander or plastic bowl. Rinse the peaches in cold water, to stop them from cooking any more.

IMAG1657

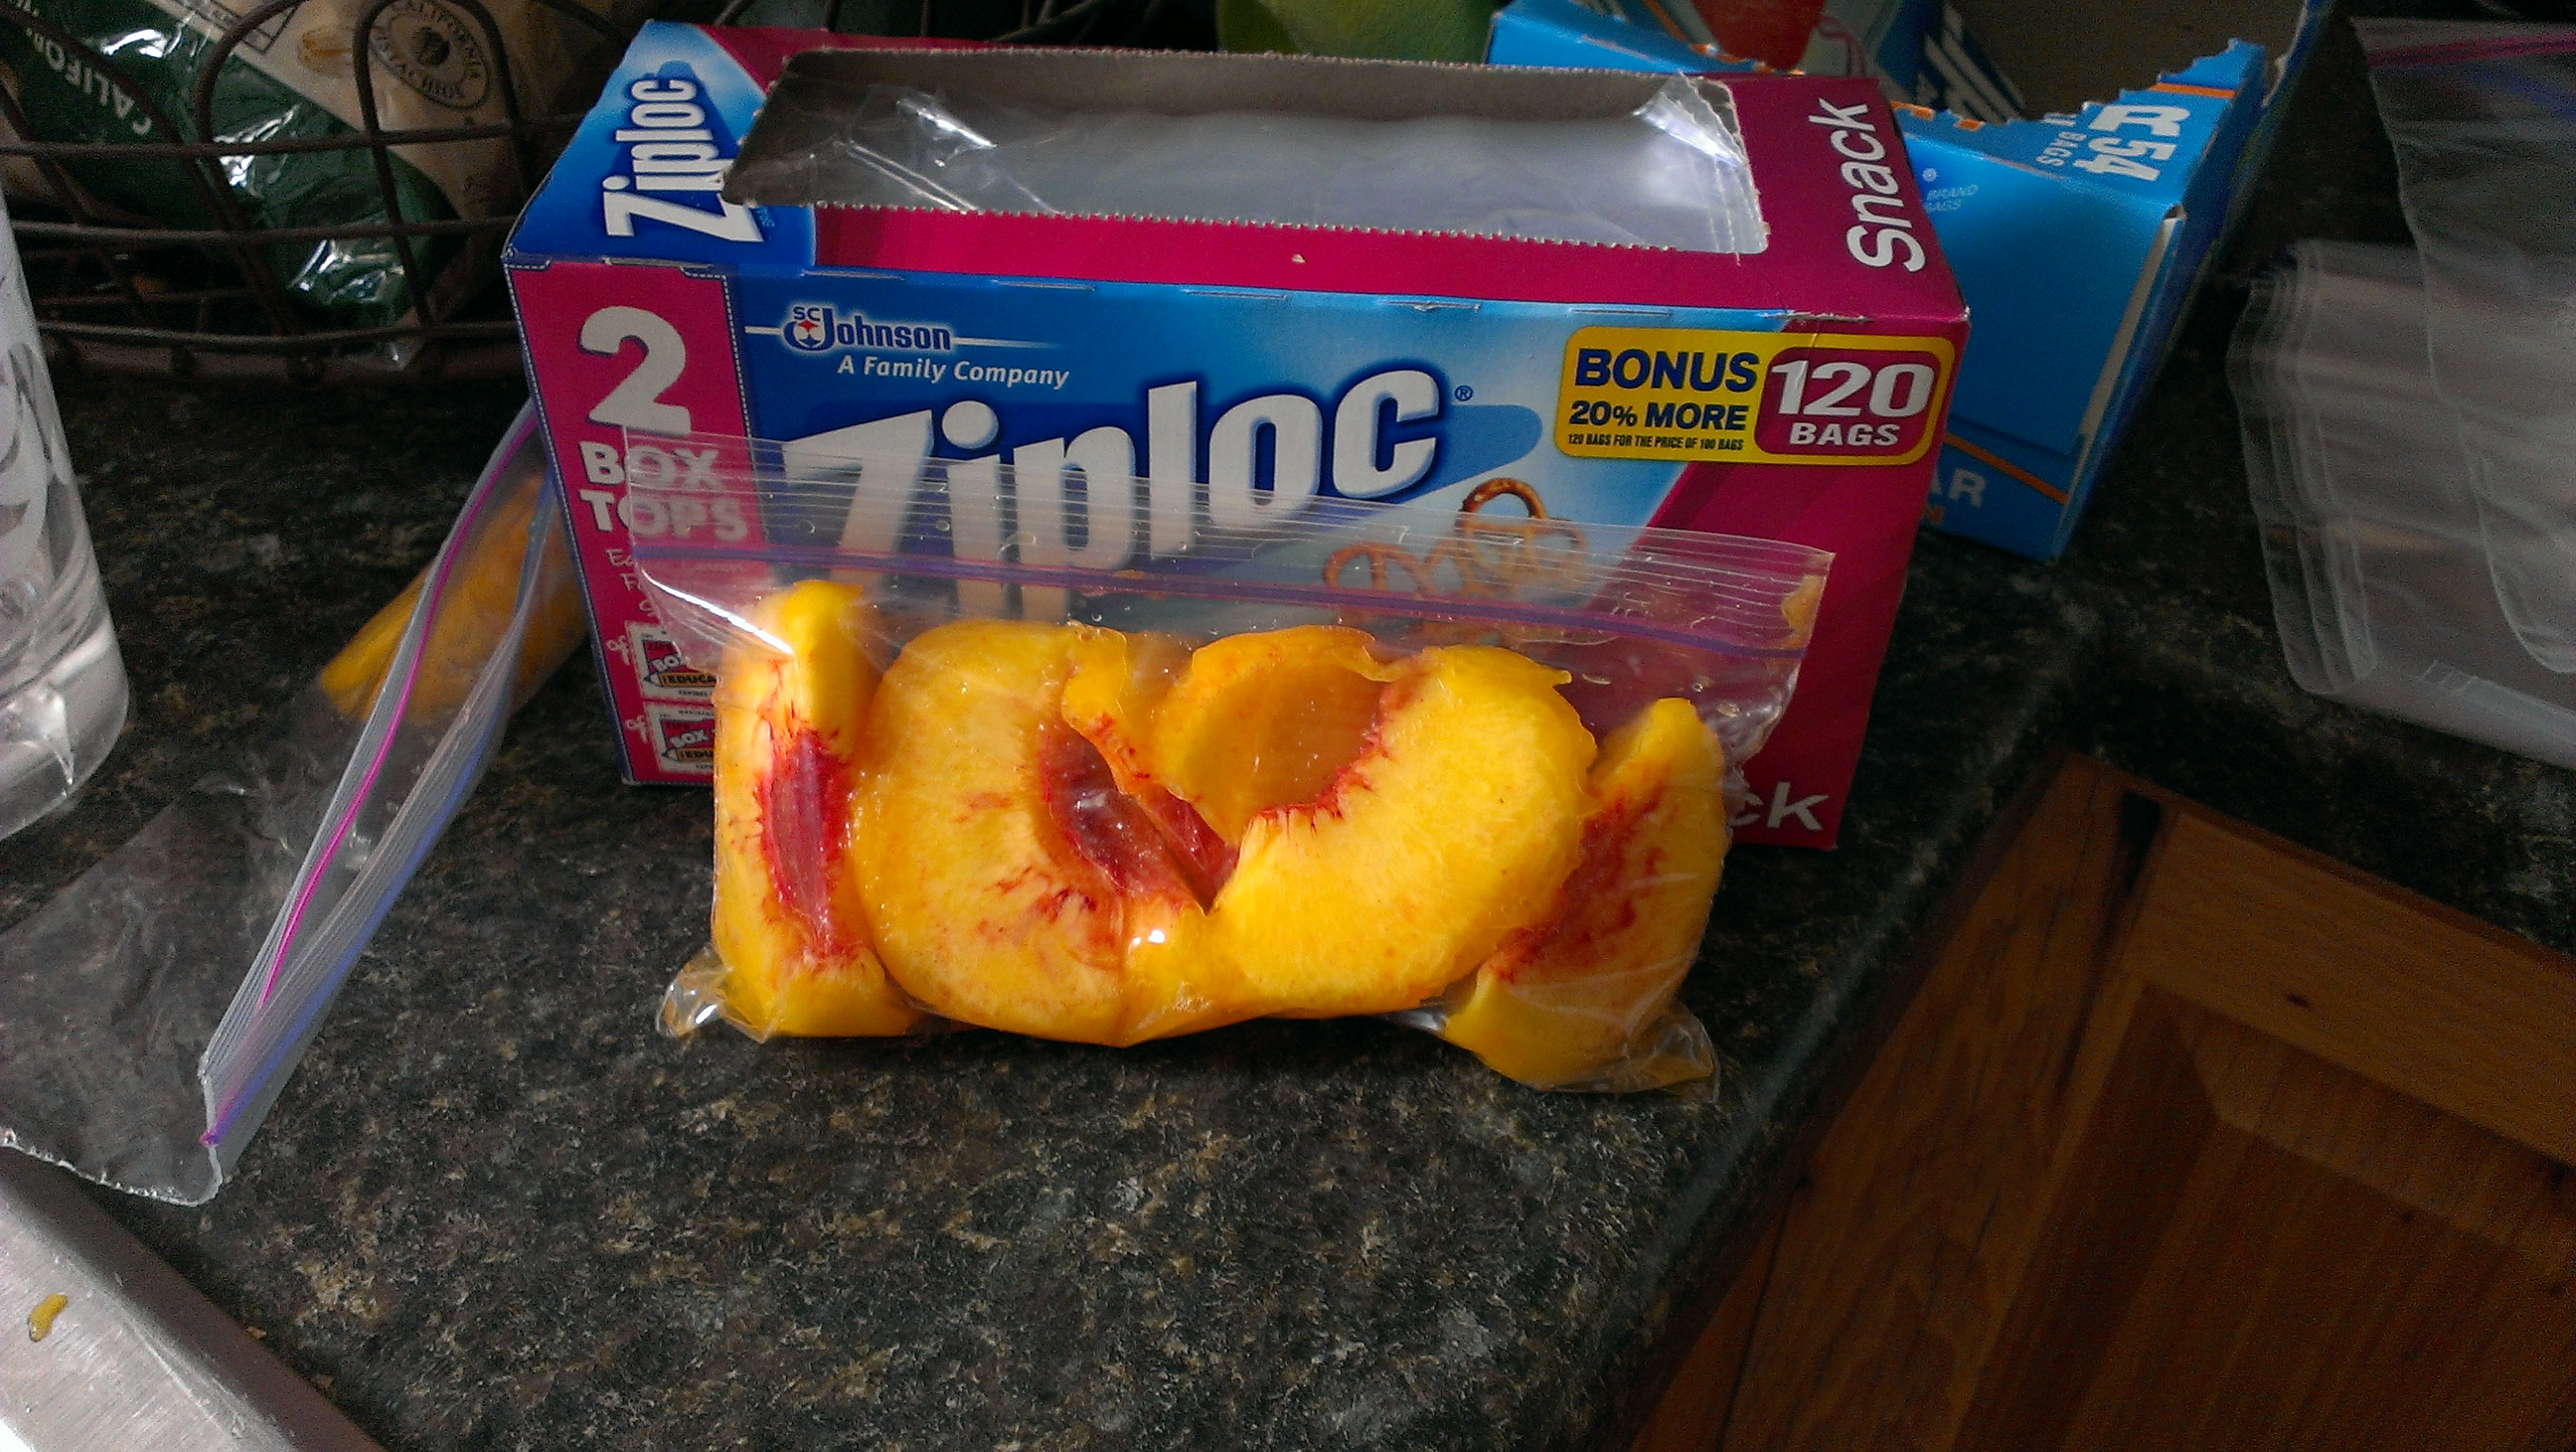
Fifth, get a snack sized bag ready to be filled. Remove the skin of a peach, which should just rub off. Cut the peach in half. Remove the pit, and cut the peach into eight pieces. Put all eight pieces in the snack sized bag, seal, and put in a quart sized bag.

IMAG1666

Sixth, once there are four snack sized bags in one quart sized bag, seal the quart sized bag, and place it in the freezer.

IMAG1669

Tips: If skins on your peaches don’t instantly rub off, they are probably under ripe, or not the kind of peaches that do that. Either way, you can peel the peaches with your knife. If you wait an extra day or two, they may ripen up enough to rub the skins off.
If you can’t fit a whole peach in a snack sized bag, simply remove one slice and put it in the next bag.

Why the snack sized bags?

Two reasons, freezer bags aren’t always perfect, and double bagging fixes that. It keeps the peaches from getting freezer burned. Second, the snack sized bag makes it easy to portion control. When you pull out one snack sized bag, that is one peach, and probably enough for one person, depending on what you will do with it.

Skillet Peach Cobbler

image

It’s peach time! I love August for this one reason. To celebrate, I bought a huge box, and we’ve been eating peaches everyday. A new favorite breakfast side of mine are these cooked peaches. They’re very quick to cook up, and don’t have any kind of sweetener added.
4 Peaches
1/4 C Butter
1/2 t vanilla
1 T ground flax
1 T coconut flour
1. Remove the skins from the peaches. The easiest way is to place the peaches in boiling water for about 30 seconds. Then drain the water off, and rinse with cold water. The skins will slip right off.
2. Melt the butter over medium heat in a frying pan. Slice the peaches and add them to the butter. Cook the peaches for about five minutes.
3. Add the vanilla, flax, and coconut flour. Stir to incorporate with the butter and peach juice. This will form a soft crust around the peaches.

Cheese Tomato Pies

cheese tomato piesOr mini pizzas, as we called them growing up. This was one of our favorite dishes as kids, and it’s simple enough that my mom actually taught me how to make them before I left home. I haven’t made them for the longest time, but was reminded of them while talking to my brother on the phone the other day. I decided they would make a great dish for lunch, as that is the most difficult meal for me to plan. The reaction when I placed these in front of my daughters was absolute awe and joy that I had made them something so delicious looking. Of course they tasted good, too, and brought back a lot of wonderful memories for me.

Cheese Tomato Pies

Ingredients

  • 2 C flour
  • 2 1/2 t baking powder
  • 1 t salt
  • 1/4 C butter
  • 3/4 C milk
  • 16 oz cottage cheese
  • 8 oz tomato sauce
  • Sea Salt
  • Pepper
  • Parsley
  • Oregano
  • Pizza Seasoning

Instructions

  1. Preheat oven to 400°F, and line a baking sheet with parchment paper.
  2. In a large bowl, mix flour, baking powder, and salt. Use a pastry blender to incorporate butter. Add milk and use hands to bring dough together. Now you have biscuit dough.
  3. Separate dough into 9-12 balls. Place all on the cookie sheet. Flatten each ball and shape into a mini pie crust, pushing the edge up so the filling will not leak out.
  4. Cook crusts for 5 minutes in the oven.
  5. Remove crusts from the oven. Reduce temperature to 350°F. Flatten middle of crusts with a spoon if necessary.
  6. Spoon cottage cheese into the middle of each crust. Add a spoonful of tomato sauce on top of the cottage cheese, avoid the crust. Sprinkle generously with salt and pepper, and add a pinch of parsley, oregano and pizza seasoning to each.
  7. Cook pies for 20-25 minutes, or until crusts are browned on the edges.
http://kstuff.net/cheese-tomato-pies/

Complimentary Breakfast

Breakfast this morning was courtesy of our chickens and our garden.
image

Our Buff Orpington started laying this last week.
image

We gathered six tiny eggs from her, and decided that might be enough to feed all of us, so we cooked them up this morning.
image

Then we got our first Hamson tomato, and diced it to add to the eggs. I scrambled the eggs, added a little salt and pepper, and then added the tomatoes. The juice from the tomatoes made the eggs cook for longer, but, also, kept them moist.
image

The scrambled eggs with tomatoes were delicious. We ate every bit of it.

Homemade Fries

These are the best homemade fries ever. People will be asking for them over and over again, and they’re so simple that you’ll make them every time.

Homemade Fries

Homemade Fries

Ingredients

  • Potatoes
  • Olive Oil
  • Sea Salt
  • Pepper

Instructions

  1. Heat oven to 350°F.
  2. Line a cookie sheet with parchment paper.
  3. Cut the potatoes into thin fries. About 1/4 inch.
  4. Lay potatoes out on parchment paper. They can be touching and as close together as you can get them.
  5. Lightly drizzle olive oil over each row of potatoes.
  6. Thoroughly salt and pepper.
  7. Cook in oven for 20 minutes.
  8. Allow to cool for about 5 minutes.
http://kstuff.net/homemade-fries/

Chicken Squash Stir Fry

Chicken Squash Stir FryA friend asked me once what my go-to meal was, and I said, “stir fry.” We don’t eat rice with ours to cut back on grains, but feel free to add it if you want. This is my newest stir fry creation, and it is fabulous. Just a note, I don’t measure stuff. If I want more carrots, I add more carrots. If I want less zucchini, I only cut one zucchini. I salt to taste always, and sometimes I don’t add pepper to this dish. The only ingredient that I’m a stickler on is the garlic powder. It is what makes this dish divine. Without it, this would just be another average stir fry, but with too much of it, this would not be palatable. So, just a light dusting of garlic powder, and you’ll be set.

And, lastly, that lettuce came from my garden! Oh and it is super delicious. Watering everyday has really enhanced the flavor. I hope everybody’s gardens provide them with such deliciousness.

Chicken Squash Stir Fry

Cook Time: 30 minutes

Yield: Serves 6 people

Ingredients

  • 2-4 T butter
  • 6 chicken tenders
  • 2-3 carrots, diced
  • 1 onion, diced
  • 1 yellow squash, diced
  • 1-2 zucchini, diced
  • 1/2-1 t. salt
  • 1/2 t. pepper
  • 1/8 t. garlic powder

Instructions

  1. In a large frying pan, heat butter over medium heat.
  2. Add chicken, turning occasionally to cook evenly, and salting.
  3. Cut chicken into small slices using cooking scissors.
  4. Add carrots, and cook for about five minutes, stirring occasionally.
  5. Add onion, yellow squash, and zucchini, and cook until tender. About ten more minutes, stirring occasionally.
  6. Add salt and pepper to taste and garlic powder. Cook about five more minutes.
http://kstuff.net/chicken-squash-stir-fry/

Paleo Burger

So, I should have take a picture of this, but I didn’t, so you’re just going to have to trust that this is super tasty. Since we don’t eat grains anymore (at least most of the time) we haven’t had hamburgers for a long time, which is a shame, since they really are healthy for you despite what vegetarians might say. A friend mentioned that certain burger restaurants had protein style burgers where they just put lettuce on the ends of the burger, so I decided to try it out. I have a huge head of Iceberg lettuce that was just going to rot in my fridge, because we much prefer the taste of Romain lettuce, so I picked a few leaves off the head, which was much harder than I thought it would be, probably because it had been wrapped in cellophane. Then I made some super scrumptious burgers that were just delicious. Here’s the recipe.

Paleo Burger

Ingredients

  • 2 hamburger patties
  • 1-2 bell peppers, sliced thin
  • sea salt
  • pepper
  • 4 bacon slices, cooked
  • 3/4 C shredded cheese
  • 1/4 C baby spinach
  • lettuce

Instructions

  1. Cook the patties in a frying pan, adding salt and pepper.
  2. Add the peppers as soon as you're done slicing them.
  3. When the patties are cooked, place the on a plate, add a few pieces of spinach, and top with a small handful of cheese. Put the plate in a cold oven, and then turn the oven on.
  4. Heat bacon in the frying pan.
  5. When heated through, remove the bacon and peppers from the burner.
  6. When cheese is melted, remove from oven.
  7. Place lettuce on two plates, add patties, bacon, and peppers, then top with another lettuce leaf.
  8. Enjoy!
http://kstuff.net/paleo-burger/

Shelf Reliance Sausage Vegi Soup

This is Shelf Reliance soup all the way. It was delicious and filled me up without needing any bread to dip in it! It took me less than 30 minutes to prepare.

Sausage Vegi Soup

Ingredients

  • 2 T butter
  • 2 T onions (FD)
  • 1/2 C sausage crumbles (FD)
  • 2 C chicken stock/ vegi stock/ water
  • 2 T celery (FD)
  • 2 T carrots (dehydrated)
  • 1/2 C green beans (FD)
  • 1/2 C zucchini (FD)
  • sea salt
  • pepper

Instructions

  1. In a sauce pan, brown onions and sausage in butter.
  2. Add stock.
  3. Add celery, carrots, green beans, and zucchini and simmer until hydrated.
  4. Sea salt and pepper to taste.
http://kstuff.net/shelf-reliance-sausage-vegi-soup/

Ramen Vegi Soup

Everything came from my food storage.

Browsing Pinterest, I came across a wonderful blog post about simplifying your life with children. It’s a wonderful read, and it lead me to another post about this lady’s daily routine. Part of their routine is lunch, like most people, and she says that she just makes soup for lunch, because it simplifies things. I love soup! For some crazy reason, it never occurred to me that it would be okay to eat soup everyday. So, today I made soup. This is a food storage soup all the way.

Ramen Vegi Soup

Ingredients

  • 1/4 C onions (FD)
  • 1/2 C dehydrated carrots
  • 2 C green beans (FD)
  • 1 C green peas (FD)
  • 1 can of diced tomatoes
  • 2 pkg ramen, crushed and seasoning packets removed
  • 1 qt of chicken stock
  • 1 qt of water
  • Salt and pepper

Instructions

  1. In a large pot, combine stock, water, onions, carrots, green beans, green peas, and tomatoes.
  2. Bring to a boil.
  3. Season with salt and pepper.
  4. Add ramen, and cook for 3 minutes.
  5. Serve with milk.
http://kstuff.net/ramen-vegi-soup/

It’s delicious, easy, and a great way to get rid of all those ramen noodles before they go stale.

Freezer Meals: Left-over Style

I think it’s time that I write a post about freezer meals, since they have saved my sanity when it comes to making dinner. I love cooking and experimenting, but I just can’t do it every day. Freezer meals make it possible for me to feed my family healthy meals every day, while saving me time and money. This method of freezer meals, also, makes it possible to save leftovers for a few months, instead of having to eat the same thing twice in one week, which is an issue in our house.

Last Monday, I made a wonderful meatless chili in my crock pot (seriously the best cooking device ever invented). Our tiny family didn’t even eat half of it, so I broke out my freezable Tupperware, piled the leftover chili on in, and froze it for later. I put some chili in the fridge for myself for later that week, because I don’t mind eating leftovers in the same week. Well, this Monday came around, and it was time for Meatless Monday again, and rather than slaving over some other meatless meal that could have been a dud, because I’m not a pro at meatless yet, I baked some potatoes in the oven, reheated the chili in the microwave, and within 10-15 minutes of work, we were eating dinner. The potatoes took an hour to bake in the oven, but I was playing outside with my family while that was happening.

Yes, this came from my freezer!

If you have a larger family that would eat through the entire pot of chili, the simple solution is to make twice what you normally would. You’ll only have to spend one hour or less of chopping for two meals. The other great thing about making your own freezer meals is that you can portion control everything. I put my meals in small Tupperware or Ziploc bags, so that I don’t have to thaw and then refreeze my meals.

This is the Meatless Chili that I made.

Meatless Chili

Prep Time: 30 minutes

Cook Time: 8 hours

Total Time: 8 hours, 30 minutes

Serve alone or over a potato with cheese and sour cream.

Ingredients

  • 1/2 onion, diced
  • 3 garlic cloves, minced
  • 1 green bell pepper, diced
  • 2 medium zucchini, diced
  • 2 medium carrots, diced
  • 3 tablespoons cornmeal
  • 1 pkg McCormick Chili Seasoning Mix, original
  • 2 15 oz cans diced tomatoes, undrained
  • 2 15 oz cans pinto beans, rinsed and drained
  • 1 15 oz can kidney beans, rinsed and drained
  • 1/2 C of quinoa
  • 1 C of water

Instructions

  1. In a crock pot, combine onion, garlic, green bell pepper, zucchini, carrots, cornmeal, seasoning packet, diced tomatoes, pinto beans, and kidney beans.
  2. Cook for 8 hours on low.
  3. In the last 15 minutes, bring water to a boil in small saucepan.
  4. Add quinoa to water and return to boil.
  5. Simmer on low for 15 minutes, or until the quinoa has absorbed all the water.
  6. Add quinoa to the chili.
http://kstuff.net/freezer-meals-left-over-style/