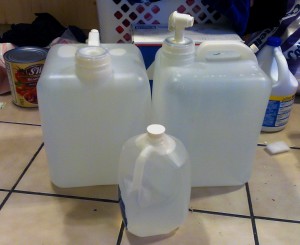
 We store water as part of our food storage. Not in the massive quantities that are possible, but we have enough five gallon jugs for about a week. In the four years that my husband and I have been married, we have needed to use our emergency water stores twice. First, when we moved into our house in the middle of winter, and second, just recently during the heat of summer. We have used them while camping, but that was just to empty the jugs so we could refresh them.
When we first moved into our house, we noticed that the tub in the basement was backing up with dirty water. After a lot of drama, and finally taking things into our own hands, we found that the sewer line was broken. This affected all aspects of life at home. We couldn’t shower, use the toilet, do laundry, or turn on the tap, because the water wouldn’t drain. Our emergency water became our drinking water, and other needs were taken care of at family’s houses. Thankfully our kids were all in diapers at the time, and thankfully a sewer line break constitutes an emergency, and thankfully the weather was mild enough that we weren’t forced out of our house until the break could be fixed. The break was repaired within two days, but all the drama before taking things into our own hands took about a week. We used all of our water, and refilled a few times at family’s houses.
This second time, for some reason unknown to us at this time, our tap water has a very sour taste. It is so bad that even our reverse osmosis filter cannot get rid of it. The water for our city is ground water that collects in a few different wells. The only filtration process it goes through is while it seeps through the Earth to the wells. The city then adds some chlorine and sends it on to us. Letting the Earth filter your water is actually a legitimate way to get clean water, so long as there aren’t pollutants for the water to come in contact with. Thankfully the sour taste is subsiding, but it has been good to have our water stores to drink from while that happens.
And, those are two everyday reasons to store water. Crazy emergencies that involve breaking out the 72 hour kits may never happen, but you will still need water for the small emergencies that happen all throughout life. Storing water brings stress levels down even when the incident may be as small as the water tasting a little funny.

