Early April 2015 Garden Update

SeedlingsGod has answered my prayers today for rain. Although looking outside, I am debating if it is rain or really slushy snow. It is so wonderful to not have to water today. That is the biggest downfall of living in the desert, there is never enough water it seems. This year is even more nerve wracking, since we only got snow for Christmas, and maybe a few other times, but certainly not enough to pull us out of the drought we were in last year, despite all the wonderful autumn rain. One thing is for sure, though, you become an expert at the weather when you are a gardener.

So, while we are blessed with rain on this beautifully, cloudy day, I am focused on my indoor gardening. I have started my summer seeds, to be planted outside in roughly one month from today. Planted six days ago, my seedling tray now contains 10 Marketmore cucumbers, 7 Noir De Carmes cantaloupe, 1 Crimson Sweet watermelon, some German Queen tomatoes (I couldn’t tell how many were pushing up through the dirt), 1 Stupice tomato, 3 Sun Sugar tomatoes, 3 Paul Robeson tomatoes, 4 Sungold Select II tomatoes, 1 Tondo Scuro Di Piacenza zucchini (an heirloom eight ball zucchini), 1 Connecticut Field pumpkin, 1 cilantro, and 41 Green Mountain Multiplier onions. I am just imagining all the food I can get with that alone, but there is more I am still waiting on: Dark Green zucchini, Spaghetti squash, Jack Be Little pumpkins, and I am hoping for more watermelon.

Outside, my Tom Thumb peas are doing well, and my Swiss chard has sprouted. The strawberries are in bloom, and produced many new starts, which I moved to an empty area. I still need to finish weeding them. It’s slow going, since the majority of the weeds are mint and grass, two of the most difficult weeds you could ever have in an area. I bought seed potatoes at my favorite nursery yesterday, Yukon gold, a red variety, and a blue variety. The box for them is cleared, and simply needs to be loosened and compost added to it. And, finally, all of the carrots have been harvested from last year. They are so tasty, and digging them out of Mel’s mix has got to be the most fun thing you can do with your children in the garden. Imagine playing in a sandbox filled with dirt and carrots, instead of sand, and then being able to feed the carrot tops to the chickens, because they love them.

President’s Day Gardening

On President’s Day, as I was finishing lunch, I looked out the window and saw snow! We’ve had practically nothing since Christmas, and now on the day I was finally ready to work in my garden, it decided to snow? I ran outside as fast as I could, determined to get some work done before it got too cold. Half way through, the flurries stopped, and it was just cold. The first step to getting a garden ready is cleaning up from last year. My chickens did most of that for me, when we let them loose on the garden during the winter, but there was a pumpkin vine they didn’t touch and a bunch of those giant prickle weeds, so I grabbed a huge garbage bag and started filling it up. Then I made my way to my smaller boxes and started cleaning those up. They were mostly full of some sort of grassy weed, as I had harvested everything from all but one box last year.

Chickens digging through the grassy weed.

Chickens digging through the grassy weed.

Delicious winter carrots.

Delicious winter carrots.

The box that still has food in it is full of carrots, because they over winter beautifully, and since this winter was so mild, I didn’t even have to cover them. I cleared out the grassy weed from this box as well, and fed all of the weed to my chickens. I figure it’s some sort of annoying grain, which chicken’s love, and they’ve been enjoying digging through it. I, also, suspect that this weed helped to insulate my carrots when the temperatures did get cold. So, this weed and I don’t have too bad of relationship, especially considering how easy grass is to pull out of Mel’s Mix.

Thistle. These are all over my yard, even in my grass.

Thistle. These are all over my yard, even in my grass.

This weed and I, however, have a very complex relationship. Thistles are considered a noxious weed, which means it’s attempting to take over the planet. No, really it means harmful, poisonous, or very unpleasant. In this case, all three, though it is only mildly poisonous. When they bloom, they’re deathly beautiful, but they kill to even lightly brush up against. Don’t wear flip flops around these things. I’ve been collecting any of the dead flowers I can find, in a probably futile attempt to prevent them from growing in my garden. They’re so hard to get rid of that even digging them out doesn’t stop them from coming back. Once I had a thistle so big that a colony of ants made it their home. That was gross.

Clean garden box and large garden pot, ready to be planted

Clean garden box and large garden pot, ready to be planted

After a quick, though not thorough, clean up, I devoted my energy to one box. My chickens used it as a place to dust bathe in, so there was lots of chicken manure and feathers strewn about it. I left them there and hoed them in, while breaking up the Mel’s Mix to make it nice and soft for this year. The dirt was thawed completely, and I wonder if it even froze this year. After about fifteen minutes, the box was ready, except for needing a little compost for added nutrients. I don’t know if my compost pile even did anything this winter, because there wasn’t any snow to insulate it while it rotted. I’ll be checking the bottom of the pile later this week to see if I need to buy some compost or not, and then, I’ll be planting Tom Thumb Peas. I’m very excited to eat them. Combined in a stir fry with the carrots planted last year, it’ll be delicious.

72 Hour Kits

72 hr kitsI finally got our 72-hour kits finished last April after years of trying to accomplish this goal. I have been scouring Pinterest for ideas on how to make these. I read the Red Cross’ guidelines for the first 72 hours after an emergency occurs. I even found calorie recommendations for men and women at different ages. And then, realizing that I was never going to get it exactly the way I wanted it, I broke down and bought two 2-person 72 hour kits from Thrive Life (used to be Shelf Reliance).

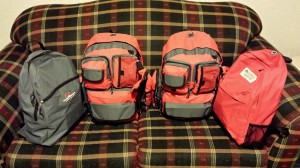
These kits comes with enough supplies for two people, a small amount of water, packaged so that it lasts for five years, and two 3600 Kcal bars, which also last five years. There are four basic kits, each in a nice plastic bag. There is the hygiene kit, to which I added baby shampoo, a travel brush and mirror, Q-tips, and travel deodorant. I, also, took the sanitary pads out of my husband’s pack and put them in mine. To the first aid kit, I added fun band aids for the kids, sunscreen, aloe vera gel, and chap stick. I don’t know why these kits didn’t come with sunscreen. That seems like a pretty logical thing to put in a 72-hour kit, but a travel size was cheap enough, so it wasn’t that big of a deal. I, also, moved the first aid kit to one of the front pockets on the backpack for quick access, and to make more room for food in the backpack. The survival kit, as I call it, comes with some basic stuff to help you get through some of the crazier things that can happen in an emergency. I didn’t add anything to this kit. And the warmth kit, is all about staying dry and warm. I added more hand warmers and an emergency blanket. There is, also, a very nice wind up flashlight. It’s the best one I’ve ever seen. As well as a large water bladder, water purification tablets, and an emergency preparedness guidebook. I added some tissue and plastic bags to the outside pockets.

For clothing, I added two pairs of socks, two pairs of underwear, an extra shirt, and extra pants for the girls. For entertainment, I added small coloring and sticker kits, extra crayons, puzzles, glow sticks, a slinky, a jumpy frog, a maze, a note pad, a magnifying glass, and dominoes. Most of that came from the dollar store. I made backpacks for the girls, which contain the toys, their clothes, and the half of the food that is for snacks. For food, since the girls will probably not eat the calorie bars, and my husband will need more calories than the kits came with, I added dark chocolate acai bites, dark chocolate pomegranate bites, M&Ms, Reese’s pieces, fruit leather, applesauce, raisins, slim jims, and beef jerky. For lunch and dinner we have tuna salad, chicken salad, and BBQ chicken salad.

72 Food

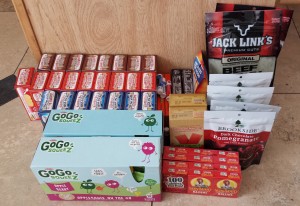
One thing to keep in mind is that things expire. All of the food expires eventually, so we made sure to get food that would last at least six months. Last night, since it’s been six months, we took out all the food that will expire before next April. Today we’re munching on applesauce packets, fruit leathers, and slim jims, because they haven’t gone bad yet. I’m going to buy replacements for them that may or may not be the same thing, but I will keep calories and food type in mind. The calorie bars will need to be replaced in five years, as well as the tiny bit of water. The deodorant and sunscreen will need to be replaced eventually. Clothes needs to be updated as children grow… and adults, too. Because my girls are so close in age, I actually just gave the younger one the oldest’s clothes and found some new clothes for the oldest. It was super simple, which is the best way to manage these kits. Entertainment needs to be kept age appropriate as well. We’re adding a few books this time.

Keeping on top of these kits has many benefits. The best, I think, is that you get to change your mind about what’s in them. I have decided that the slim jims are disgusting, so for myself, I’m going to try to find some other kind of protein that will last at least six months. Eventually we’re going to test the calories bars to see if my husband can even handle eating them, but until then, I’m adding antiacids and Digestzen, so that he can cope in an emergency. My kids will actually fit in the clothes in their packs, probably for another year. And, finally, when new family members arrive, you are reminded to make them a kit as well. I have a whole new kit to make for a baby, which hopefully won’t cost too much.

Here’s a quick list of what I’m putting in his backpack for those who need an infant 72 hour kit list, and then I’ll be off.

1 small can of formula
3 bottles of Smart Water
1 bottle
15 size 3 diapers
travel wipes
diaper rash cream
3 size 9mo PJs (Just a guess as to how big he’ll be in six months. I’m going to the DI for these.)
3 size 9mo onsies
jacket
blanket
3 purees (Put as much as you think your baby will be eating in six months.)
toys
mylicon
tylenol

Good luck! Don’t over think this. The important part is that you have something in an emergency, not that it’s absolutely perfect. Also, keep the kids packs light, as you will probably be the one carrying them, and the kids, and your packs. Again good luck, may we never need to use these.
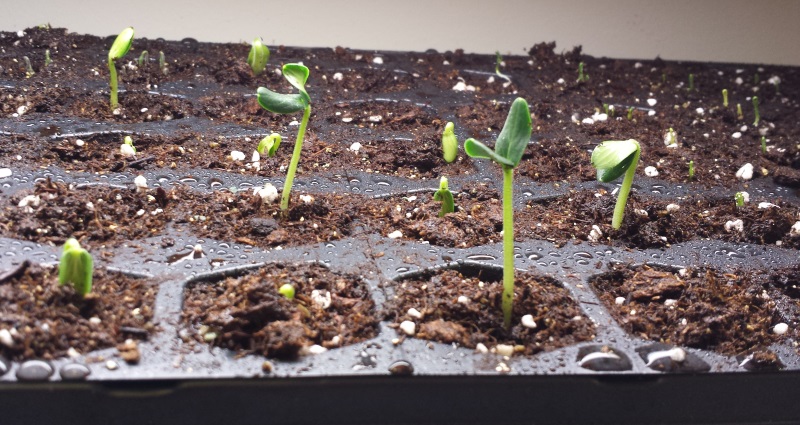
Cow’s Milk Free Quiche

image

Quiche is a family favorite, but given the amount of milk and cheese in it, we haven’t had it in over a year. Our chickens gave us so many eggs recently, that I could think of no other way to use them other than in a quiche. So, I experimented, and it worked the first time, which is amazing. The texture is not perfectly the same as if it had milk and cheese, but the flavor is very similar, and my kids still eat it, so it must be good.

Every good quiche starts with an amazing crust. I use this crust recipe for every crust I ever make, pumpkin pie, apple pie, chicken pot pie, and quiche. This is a butter crust, so if butter is on your list of no-nos, there are shortening and oil crusts out there that some people prefer, but the butter crust is my favorite, and thankfully our lactose intolerees can handle it.

Butter Pastry Crust

1 C flour
1/4 t salt
6 T butter
1 egg

Combine flour and salt in a small bowl. Cut in butter and mix using a pastry blender. Add egg and form dough into a ball. Flour a flat surface and a rolling pin. Roll out dough to about 1/4 inch thick. Gently place crust into pie pan and form edge as desired.

For a quiche, cover crust with foil and place rice or beans on top of the foil to keep crust from bubbling up. Cook in a 450°F preheated oven for 8 minutes. Remove foil and cook for another 4-5 minutes. Remove crust from oven and lower temperature to 325°F.

Filling

4 T butter or oil
4 T cornstarch or arrowroot powder
1 1/2 C coconut milk, divided
1/8 t cayenne pepper
1/2 t pepper, divided
3/4 t salt, divided
1/4 t garlic powder
1/2 lb. ground beef
1/4 C FD* onion or 1/2 fresh onion
7 eggs
3 C swish chard, chopped

*freeze dried

In a small sauce pan, melt butter over medium heat. Whisk in cornstarch. Add 1 C of coconut milk all at once. Stir to incorporate with butter mixture. Add cayenne pepper, 1/4 t pepper, 1/4 t salt and garlic powder. Stir continuously. Sauce will start to boil and then thicken. Remove from heat when it has the same consistency as gravy, and allow to cool.

In a frying pan, brown ground beef and add onion.

Place eggs in a medium bowl, and add 1/2 C of coconut milk. Whisk in coconut and butter sauce. It will be lumpy. Add beef and onion mixture and swish chard. Pour into crust and cook in a 325°F oven for 60 minutes. Let cool for 5 minutes and serve warm.

Granola Trail Mix

imageI made a goal to make granola as part of my 101 Goals, but when I started the Paleo diet, I figured that one would never get accomplished. But, I’ve switched back to my hypoglycemic diet, so that my body can get the benefits that diet offers, and oats are not evil for the time being. I stumbled across this Applesauce Granola recipe, happened to have all the ingredients already on hand, and decided to make it. I cut out the brown sugar, so the only sweetener is a tablespoon of honey. By itself, the granola is quite bland, and I was worried that it was just going to sit around for a few months, before I threw it out. Then I got the idea to make a snack out of it, and I created this delicious trail mix. The practically unsweetened granola allows the other flavors to stand out and shine. I’ve even considered eating this as a cereal, because it would be fantastic. My girls are constantly begging to snack on this, and I’m okay with them doing so.

2 C Granola
1 C FD* Raspberries
1 C FD Strawberries
1 C FD Vanilla Yogurt Bites
1 C Raisins
1 C Unsalted Pumpkin Seeds

*freeze dried

Mix together and store in an airtight container. If you really want to be super healthy, leave out the yogurt bites, as those have sugar added, made glaringly obvious by how my girls eat all of those first. If you don’t have any of the freeze dried foods, it’s still really good with just the raisins and pumpkin seeds.

Farewell Credit Card

IMAG2051We are excited to say a much anticipated farewell to our largest credit card. We will not miss you. We will not mourn the loss of you. We will never ever use you again, and we are so excited to see you go! We will allow you to let our credit score look awesome for a brief second, and then we will shut you down, because you are a horrible piece of plastic that I hate, hate with a vengeance. We hate the $50 of interest you gave us every month. We hate how you gave us the option of slavery. And we hate how you never seemed to go away no matter how hard we tried. So, fare thee well you stupid piece of plastic that caused us so much pain and hurt and familial discord. You are out of our lives forever and you are never coming back.

Dairy Free Spinach Dip

IMAG1957We had a fondue night with some friends, and needed a non-dairy dip for our lactose intolerant daughter. I wanted something like a cheesy spinach dip, without the actual cheese. After browsing many spinach dip recipes, I decided to try a dairy free white sauce, mixed with spinach. To give it a bite like cheese, I added cayenne pepper.  This is really good with chips, cheddar cheese, and bread.


4 T butter*, coconut oil, or olive oil3-4 T cornstarch or arrowroot
2 C coconut milk
dash of cayenne pepper
salt
pepper
1 T Worcestershire sauce
2 C FD** spinach
1 1/2 C chicken stock or water

*Our lactose intolerant can handle small amounts of butter.**freeze dried

1. Melt fat of choice in a sauce pan. Add cornstarch to thicken. Stir in coconut milk and heat over medium heat to thicken. Add spices and Worcestershire sauce.

2. Heat spinach and stock until stock is mostly gone.

3. Add reconstituted spinach to white sauce. Heat over medium heat for about 15 minutes until thick. Stir frequently.

Everyday Reasons for Storing Water

waterWe store water as part of our food storage. Not in the massive quantities that are possible, but we have enough five gallon jugs for about a week. In the four years that my husband and I have been married, we have needed to use our emergency water stores twice. First, when we moved into our house in the middle of winter, and second, just recently during the heat of summer. We have used them while camping, but that was just to empty the jugs so we could refresh them.

When we first moved into our house, we noticed that the tub in the basement was backing up with dirty water. After a lot of drama, and finally taking things into our own hands, we found that the sewer line was broken. This affected all aspects of life at home. We couldn’t shower, use the toilet, do laundry, or turn on the tap, because the water wouldn’t drain. Our emergency water became our drinking water, and other needs were taken care of at family’s houses. Thankfully our kids were all in diapers at the time, and thankfully a sewer line break constitutes an emergency, and thankfully the weather was mild enough that we weren’t forced out of our house until the break could be fixed. The break was repaired within two days, but all the drama before taking things into our own hands took about a week. We used all of our water, and refilled a few times at family’s houses.

This second time, for some reason unknown to us at this time, our tap water has a very sour taste. It is so bad that even our reverse osmosis filter cannot get rid of it. The water for our city is ground water that collects in a few different wells. The only filtration process it goes through is while it seeps through the Earth to the wells. The city then adds some chlorine and sends it on to us. Letting the Earth filter your water is actually a legitimate way to get clean water, so long as there aren’t pollutants for the water to come in contact with. Thankfully the sour taste is subsiding, but it has been good to have our water stores to drink from while that happens.

And, those are two everyday reasons to store water. Crazy emergencies that involve breaking out the 72 hour kits may never happen, but you will still need water for the small emergencies that happen all throughout life. Storing water brings stress levels down even when the incident may be as small as the water tasting a little funny.

Spelt Pancakes

IMAG1702Spelt is a grain, very similar to flour, but it behaves slightly different. It has gluten, so it will hold things together, but it doesn’t keep things in a nice, tidy package. I experimented with Spelt today by making pancakes for breakfast. When I got it right, they looked amazing and were delicious. The first two attempts, however, produced flat pancakes, that nobody has wanted to try so far. Those two were just Spelt. With mouths to feed, I gave up on my Spelt experimenting, and added some whole wheat flour. The results were great. Still mostly Spelt, with a bit of flour, the pancakes held a perfectly round shape and fluffed up nicely. I cut up a peach for topping, and put some butter, honey, and applesauce on the table as well.

IMAG1683

Here is the recipe:

2 C Spelt flour
1/2 C whole wheat flour
2 t baking powder
1/2 t baking soda
1/4 t salt
2 fresh chicken eggs (or just one if your chickens lay large eggs)
1 1/2 C buttermilk
3 T butter, melted
1 T honey

In a large bowl, combine spelt, wheat, baking powder, baking soda, and salt. In a separate bowl, combine eggs, buttermilk, and butter. Add wet ingredients all at once to the dry ingredients. Mix until moist. Add honey and mix as well. Cook 1/4 C at a time on a hot skillet. Top as desired, like this little girl is doing.

IMAG1690

Freezing Peaches

IMAG1646Peaches are God’s gift to the Earth, and it is finally August! They are my absolute favorite fruit, and I refuse to eat any others than in season, Utah peaches. The one exception to that is frozen, Utah peaches (say, in the middle of January). I buy my peaches by the box, and never at the store. I prefer to go straight to the farmer. My favorite farm to buy them from is in Orem on 400 S and about 250 W. I discovered them last year, while on a ReStore run, and have been stalking them since the end of July of this year. The farmer is very kind and added extra peaches to my box, which was only $18!

To freeze peaches, you need a few supplies: a big pot of water, filled half way, snack size bags, quart size freezer bags, a sharpie, a colander or large plastic bowl, a draining spoon, and a knife. You will, also, need free stone peaches. Free stone means that the peach will come right off the pit without much effort on your part. This is essential for preserving, so that you can save your sanity.

IMAG1651

First, clean your sink. Do your dishes, and scrub all the gunk off the walls of your sink. You need this area to be clean, because your peaches will be down in there.

Second, boil that big pot of water.

IMAG1655

Third, while the water is coming to a boil, use your sharpie to label the quart size bags, “Peaches” and the date.

IMAG1661

Fourth, once the water has come to a boil. Add as many peaches as you can. Boil for 30 seconds. Set your timer, so you get it right. Then pull the peaches out using the spoon, and put them in the colander or plastic bowl. Rinse the peaches in cold water, to stop them from cooking any more.

IMAG1657

Fifth, get a snack sized bag ready to be filled. Remove the skin of a peach, which should just rub off. Cut the peach in half. Remove the pit, and cut the peach into eight pieces. Put all eight pieces in the snack sized bag, seal, and put in a quart sized bag.

IMAG1666

Sixth, once there are four snack sized bags in one quart sized bag, seal the quart sized bag, and place it in the freezer.

IMAG1669

Tips: If skins on your peaches don’t instantly rub off, they are probably under ripe, or not the kind of peaches that do that. Either way, you can peel the peaches with your knife. If you wait an extra day or two, they may ripen up enough to rub the skins off.
If you can’t fit a whole peach in a snack sized bag, simply remove one slice and put it in the next bag.

Why the snack sized bags?

Two reasons, freezer bags aren’t always perfect, and double bagging fixes that. It keeps the peaches from getting freezer burned. Second, the snack sized bag makes it easy to portion control. When you pull out one snack sized bag, that is one peach, and probably enough for one person, depending on what you will do with it.